3 DIY Home Remedy Headlight Restoration Techniques
Are the “eyeballs” in your vehicle clouded, yellowed, or simply not aging gracefully? Need an effective home remedy to clean car headlights and restore the clarity of those hazy, faded, and yellowed headlight lenses?
Read on to learn 3 effective ways to clean ’em up and add new vitality to your ride!

Hey there I’m Matt and no, that’s not me in the picture above 🙂 But let me tell you, I’ve been around cars my whole life and there’s nothing worse than dull, yellow, faded headlights. Not only are they dangerous but they look terrible! I remember one of my first cars was a 1997 Mustang GT and the yellow headlights contrasted the white body paint so bad! I spent many hours scrubbing those headlights trying to clean them.
What my naive high school self didn’t know is that soap and water isn’t enough to remove headlight oxidation. Yeah, that’s the biggest word I’ll use today!
What’s up with plastic headlights these days?
Plastic headlights are utilized in modern cars for several good reasons. One of them has something to do with cost. Plastic headlights are cheaper to manufacture than those heavy glass headlights on older cars.
The plastic can also be manipulated into any type of shape. This enables the headlights to match the contours of the vehicle, which inevitably results in better aerodynamics and overall styling.
Bonus: Read more about the pros and cons of plastic vs glass headlights
But those plastic headlights have their quirks. The most popular would have to be the tendency to get cloudy, faded, or yellowed over time. This not only makes your vehicle look old or outdated, but it will also affect the safety and visibility of your ride especially if you’re halogen lights are outdated.
Do I need to buy a headlight restoration kit?
In many cases, yes.
In fact, I would recommend you spend the $20-something-bucks to just restore your lights without a “home remedy.” It’ll last longer, be less hassle, less risk in damaging your lights, and kits are pretty affordable.
Purchasing the Meguiar’s, Mothers NuLens, 3M, or SYLVANIA quality headlight restoration kits are a sure-fire way to refurbish the look and functionality of modern plastic headlights.
No products found.
However, not all headlight restoration kits are the same. For example, the 3M kit contains sanding discs and a polishing pad to literally scrape away the dullness on the headlight covers. But you have to be careful when sanding to not sand too deep. If you do it wrong, it is easy to end up damaging (instead of restoring) the headlights altogether.
But are headlight restoration kits really that effective?
Kits will be more effective than a home remedy.But how affective they are depends on the severity of the damage. For light cloudiness or hazing, these headlight cleaning kits will erase the damage in no time at all. However, for severely clouded or oxidized headlights, the results might not be the same. In this case, it is better to consult a professional. It may be cheaper to purchase a new set of headlights than to restore or fix the damage.
How to clean car headlights – Home Remedy
This is likely the reason you’re here, looking for home remedies to DIY restore your headlights, right? Well I got good news for you then because here are 3 methods that you can use at home to save some cash and hopefully clean your headlight lenses on a budget!

Let’s get into it!
1. Bug Spray – Clean and restore with DEET!
Yes, you read it right.
Bug spray or insect repellent containing DEET is good for cleaning and restoring the clarity of plastic headlight lenses.
But there’s a catch. You can’t do this repeatedly and you HAVE to clean it off immediately or you will melt your headlight.
Home Remedy #1
The reason is because the DEET in bug spray or insect repellent will literally melt away the top layer of the plastic coating. Over time, the chemical will eventually weaken the plastic with continuous use, which will eventually damage the headlights.
But as an effective home remedy for cleaning headlights, bug spray is effective as long as you don’t do it often.
- Start with a clean surface. Wash the headlights with water and car shampoo to remove dust and dirt from the lens.
- Grab a dry microfiber towel. Spray the insect repellent ON TO THE towel until moist. Two or three sprays will do. Avoid getting on paint.
- As an added tip, remember not to apply the bug spray directly on the headlight lens.
- Wipe the headlights in a left to right and up-down motion to remove the cloudiness and haze on the lens.
- Grab a separate clean towel and give the headlights a final wipe.
- Clean the headlights with white distilled vinegar and then soap and water. Apply a UV Clear Coat like No products found.
This method is an effective quick fix in removing the cloudiness on plastic headlights. But then again, use bug spray sparingly. If this method failed to restore the clarity of the headlight lenses, do not repeat the procedure. Using too much bug spray will inevitably weaken and damage the plastic.
Watch this video by ChrisFix before you try cleaning your lights with Bug Spray!
Vinegar and Baking Soda – Restore clarity with this one-two punch!
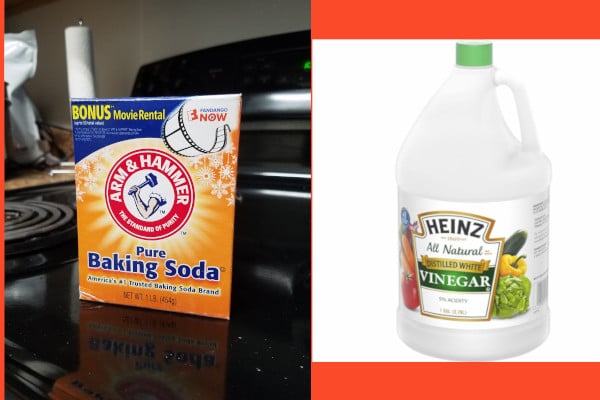
Plain old white distilled vinegar and a spoonful or two of baking soda is also an easy and effective method to restore plastic headlights. This method will remove light hazing, moderate cloudiness, and yellowing of the clear plastic lens.
Home Remedy #2
- As usual, it is best to start with a clean surface. Removing dust and dirt will also prevent scratching the headlights as you wipe the lens with the home made cleaning solution.
Wash off the headlights using water and car shampoo. Wipe dry. - Pour approximately half a cup to one cup of white vinegar in a small bowl.
- Add one or two teaspoons of baking soda in the bowl and mix well.
- Grab a clean microfiber towel. Dip a small portion of the towel in the vinegar and baking soda solution and wipe the headlights using small circular motions.
Don’t hesitate to add some elbow grease as you wipe the headlights. Focus your efforts on areas with extensive cloudiness or hazing.
Of course, you should work with one headlight at a time. - Grab a separate towel and wipe the headlight dry. By this time, the headlight will be clearer than when you started. You can choose to repeat the procedure if you wish to remove more cloudiness or haze from the lens. This is also a cost-effective method in cleaning car headlights. However, don’t expect the headlights to look good as new in the presence of severe oxidation and fading.
The Toothpaste Method – Everyone has this stuff around

If you don’t have bug spray or if you don’t want to mess around with the stinky smell of white vinegar, this next method is perfect. All you need is a small tube of toothpaste and a damp microfiber towel.
Home Remedy #3
- soap and water before proceeding. Since you’ll be scrubbing the lens with toothpaste, removing standing dirt will prevent adding scratches and surface damage to the headlights.
- Grab a small microfiber towel, dip it in water, and wring off the excess liquid. The idea is to start with a mildly damp towel.
- Squeeze out a pea-sized amount of toothpaste on the damp towel. Rub the towel on the headlights using small circular motions, making sure to distribute the toothpaste evenly on the surface of the headlights.
Don’t be afraid to add more toothpaste as needed. Rub the headlights lightly until all traces of haze are scraped off the lens. - Some people like to remove the excess haze using a dry towel, but it is easier to wash away the gunk using a small spray bottle filled with clean water or a basic garden hose. Wash away all the toothpaste residue so you can inspect the condition of the headlights. If you need to remove more haze, repeat the above steps until you achieve the desired results.
Consider Applying UV Clear Coat to Plastic Headlights
So, after cleaning the headlights with any of the above methods, what’s next? The reality is the hazing, cloudiness, and yellowing will come back if you fail to protect and seal the headlight lens after cleaning.
Read more about choosing a clear coat spray for your car headlights here
It’s very important to seal and protect those lights. I recommend you grab a can of SYLVANIA or Meguiar’s. Here’s two kits I like:
No products found.
It is similar to polishing and waxing the paint. Polishing will remove swirl marks and restore the color and shine of the paint. But if you don’t apply wax, the paint will be vulnerable to UV and weather damage. Wax will seal the paint and repel dirt, mud, and harmful UV rays. It’s the same with the headlights in your vehicle.
And since the primary cause of faded and yellowed headlights are the harmful UV rays of the sun, you’ll need to protect the lens with a UV clear coat. This product is easy to apply and will guard against weather and environmental damage. It is also ideal for all lighting accessories like the fog lights, taillights, and DRL’s in your vehicle.
Best of all, applying UV clear coat on the lenses will protect your headlights for many years to come. Make sure to consider revitalizing the UV coating on your plastic headlights by applying a fresh coat of UV protection after cleaning!
Conclusion
If none of the above How to clean car headlights home remedy worked in removing the haze and cloudiness in your headlights, it is better to consult a professional or consider buying a quality headlight restoration kit. Just make sure to read and follow the directions carefully to ensure a safe and hassle-free cleaning process.
Matt
P.S. If you’ve tried these home remedies to restore your headlights and still aren’t getting the results you need, consider upgrading your headlights bulbs. Vince and Mike wrote a couple reviews here:
Featured Image by Lisa Johnson from Pixabay