
Why apply clear coat?
Before we discuss the best clear coat for car headlights, it is important to talk about the importance of applying clear coat in the first place.
If you’ve read our guide on cleaning headlights with household items you know that you can use WD-40, toothpaste, and a solution of baking soda and vinegar to clean the “fog” off your headlights.

However, most DIY cleaning solutions will only produce temporary results.
It’s the same principle in removing scratches and swirls from paint. If you don’t polish or shave off a small portion of the clear coat to level the damage, the scratch will remain visible even if you apply wax.
In order to remove the cloudiness and haze on plastic headlights, wet sanding will produce permanent results. But after sanding the headlights, the surface will be bare and unprotected. After cleaning the lens, it’s critical that you apply a clear coat to your headlights or the cloudiness will come back as soon as a couple weeks!
Similar to after polishing your vehicle’s paint, you should apply a thin coat of carnauba wax. It’s the same principle with plastic or acrylic headlight lenses. The clear coat will act as a barrier to repel surface damage and UV rays. It will also provide lasting clarity and many years or protection against oxidation.
Read more about why headlights get foggy
The Best Clear Coat for Headlights
After sanding and polishing the headlights, it is best to apply two or three coats of clear coat. This will not only protect the headlights from future UV damage, but it will give the lenses unsurpassed clarity. Here’s two products that I suggest you use.
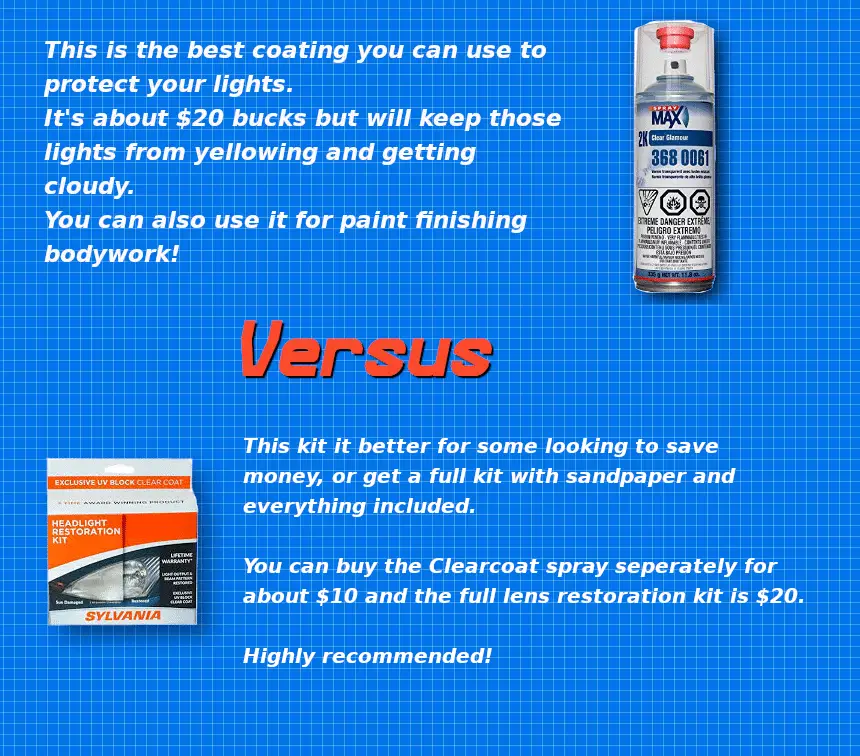
The first, Spraymax 2k, is the most effective product and you can use it to make your headlights last for years. But it’s a little more expensive, and doesn’t include a “lens restore kit.”
The second, Sylvania Restoration, is a complete kit that contains the clear coat as well as p-400, 1000 and 2000 grit sand paper. Everything you need to restore those lenses! The clear coat spray can be purchased seperataly and it’s about half the price of the Spray Max.
1. Spraymax 2K Clear Coat
No products found.
One of the best clear coats for headlights is the Spraymax 2K. This product leaves behind a superior high-gloss finish. The coating is also tough enough to protect the lenses from deep scratches and surface damage.
The product is easy to use. Spraymax recommends two to three light coats to achieve the best results. However, the Spraymax 2K Clear only has a shelf life of 48 hours upon opening the product. Since it will easily expire in around 2 days, it is best to plan ahead for multiple projects (You can use it for body-work too) so you can consume the contents in the can.
No products found.This is not exactly a big issue. But if you’re buying the Spraymax 2K Clear for the headlights only, it might not be worth the $20 asking price. But then again, this product is one of the best in terms of gloss and protection. So if you have more than one car in your garage, this clear coat will be more than enough to coat all the headlights in your vehicles.
2. Sylvania Headlight Restoration UV Block Clear Coat Kit
No products found.
First things first, you can buy the Sylvania in two different ways:
- An all-in-one kit that includes sand paper AND the UV clear coat –
The Sylvania Headlight Restoration kit is awesome if you don’t have any supplies and want a simple way to restore your lenses from start-to-finish. It comes with a surface activator to pre-clean the plastic lens prior to applying the clear coat. You also get three sets of sandpaper to wet sand. Plus you get an awesome clear coat to protect! - UV Clear Coat only
If you opt for this, it’s half the price as the full kit (and the Spraymax 2k) but you only get the clear coat. This is perfect for guys that already have the right sand paper grits or followed our home remedy for clean car headlights.
The kit also comes with an easy to follow instruction manual to guide you in the entire process. In my experience, it will take you approximately an hour or so per headlight to complete the job. This will also hold true if you’re working with severely oxidized headlights.
No products found.
The results will speak for themselves. This is not only of the best clear coats for plastic headlights, but it delivers incredible value as well.
What causes the plastic headlight lenses to fog or cloud up?

The primary culprit is UV oxidation. Plastic headlights are treated with a protective UV coating when new. But as the plastic is exposed to UV rays and weather elements, the barrier of clear coat will eventually fade or warp. If the clear coat wears off, the clear plastic lens will begin to turn yellow, which is the initial stage of oxidation.
But the sun is not the only thing to blame for foggy or cloudy headlights. Road debris such as sand, dirt, gravel, and road salt will also wear down the initial layer of clear coat. Deep scratches and pits caused by flying stones will also leave deep indentations on the lens, which will severely contribute to the cloudiness or fogginess of the lens.
How can I prevent the plastic headlights from turning yellow?
If you have a newer car, there are certain things you can do to prevent the plastic headlights from oxidizing. Since UV exposure is the primary cause of oxidation, it is better to always park your car in the shade. If you have a habit of leaving your vehicle under the hot and baking sun, you can expect the headlights to turn yellowish much sooner than expected.
Another way to prevent yellowed or cloudy headlights is to clean the headlights (and your entire vehicle for that matter) regularly. I highly recommend to wash your vehicle with clean water and car shampoo at least once a week, or once a month is the vehicle is not driven regularly. Washing the headlights will remove standing dirt and road chemicals, which are two components that contribute to accelerated wear on the plastic headlight lenses.
How to Sand and Restore Plastic Headlights (in 10 easy steps!)
If you prefer a video, check out Chrisfix’s guide:
Okay this is a pretty simple process, but it does take time. I couldn’t break it down in 3 steps, so here’s my 10 step guide 🙂
For this procedure, you’ll need a couple of items:
- waterproof masking tape and garbage bags or newspaper (if you don’t take off the headlight first)
- sand paper (400, 600 and 2000-grit)
- spray bottle filled with clean water
- clean microfiber towels or paper towels
Start with a clean pair of headlights. If the headlights are dirty, clean them first using water and car shampoo. This will prevent inducing scratches and nicks on the lens as you sand. Park the car in a shaded garage. It is more convenient to sand the headlights under the shade.
- Use masking tape to protect the surrounding areas on the headlights. This will also prevent you from sanding off painted surfaces, which is not good to begin with.
- Grab the spray bottle to apply liberal amounts of water on the headlights. Make sure the lens is soaking wet.
- Use 400-grit sanding paper to start. Spray water on the sand paper until soaking wet and proceed to sand the plastic lens using horizontal strokes. A little bit of elbow grease is required, but don’t apply too much pressure. Let the sand paper do the job. It is important to consistently spray water as you sand the plastic lens. Do not allow the lens to dry while sanding.
- Grab a clean towel to wipe of the excess liquid and grit on the headlights.
- Next, grab a small piece of 600-grit sand paper and soak it in water. Use this to sand the lens once more using light horizontal strokes. Remember to constantly spray water on the headlights as you sand the lens.
Using 600-grit will smoothen up the rougher surface left by the 400-grit sand paper. This procedure is only recommended for severely oxidized and yellowed headlights. If the headlights in your vehicle are lightly or moderately oxidized, you can skip the 400-grit and 600-grit sand paper and go straight to using 2000-grit or 3,000-grit sand paper. - This is the final sanding process. But this time, you’ll be using 2000-grit sand paper. Spray water on the sander until soaking wet. Work the sand paper until the surface is smooth to the touch. Don’t forget to consistently spray water on the headlight when sanding!This step will also remove coarse grit left behind by the 600-grit sand paper. Using a finer grade will also smoothen and level off the surface to achieve the desired smoothness and clarity.
- After the final sanding, wipe the headlight clean using a clean towel. Make sure to remove all traces of grit on the lens before applying the clear coat.
- Wait until the plastic lens is dry before applying clear coat. Depending on the product you’re using, you can either spray on the clear coat or apply using a small applicator pad. Allow the clear coat to dry for at least five minutes before applying a second and third coat.
If you prefer using a spray like the Spraymax 2K Clear, make sure to cover up the surrounding areas of the headlight to prevent overspray.
Depending on the type of clear coat, it is important to allow the solution to dry overnight, or for at least two to three hours. - You’re not done yet! The final step is to apply a thin coat of pure carnauba wax. This will add another layer of protection to protect the clear coat from harmful UV exposure and environmental elements. Apply the wax using an applicator pad and allow to dry to a haze for at least 10 minutes.
Finally, wipe off the haze using a clean towel. Now step back and admire your work!
-Mike
Main image by MikesPhotos from Pixabay