Learn how to keep your headlights shining bright for the life of your car!
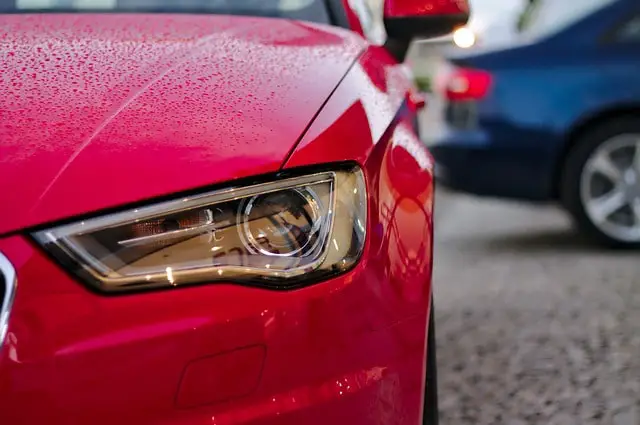
You know when you’re driving down a country road at night and the car right behind you leaves their headlights on high? That happened to me recently … but I wasn’t annoyed. I was relieved! Those high-set and bright beams made it so easy to see every twist and turn in the road.
When the other car turned down a driveway, I had to face the truth. My car’s high beams weren’t cutting it anymore. Headlight haze was the culprit, and it was time for me to take action.
Related: Why You Should Upgrade Old Halogen Headlights To An LED Or HID Kit
Why Do Headlights Get Foggy?
It doesn’t matter whether you’re driving an old Mazda or a high end BMW. Headlight haze can strike any car over time. This cloudy, sometimes yellowed effect comes from a number of sources including:
- Oxidation. When the clear protective coating wears off, your acrylic lenses are exposed to light. The UV can yellow them. This is oxidation and it sucks.
- Dirt. Even if your car isn’t obviously dirty, a fine film of soil, smoke, and pollutants can build up.
- Scratches. When you drive around, fine grit may scratch up those lenses and make them look cloudy.
- Condensation. Maybe the problem isn’t with the outside of your headlights. Maybe something’s going on inside. Although your headlights’ bulbs are sealed in acrylic units, over time those seals can fail. Water vapor can sneak in and fog everything up.
How Do I Keep My Headlights From Getting Cloudy?
Looking to prevent or delay cloudy lens issues? Keep them clean and promptly repair seals at the first sign of condensation. However, given enough time and driving-related wear and tear, there’s a good chance that the acrylic layer will get damaged.
If you want to make your headlights last longer, then consider purchasing a headlight coat spray and apply it once a year. This will drastically prolong the life of your lens housing. I reccommend the Meguiar’s Headlight Coating
No products found.
How Big of a Problem is This?
According to AAA, headlights that have deteriorated (including those with headlight haze) may only be putting out 20% as much light as they’re supposed to. A big difference like that makes it challenging and downright dangerous to drive around at night. Worst of all, this light reduction sneaks up on you. As the years pass, it’s all too easy to get used to your dimmer headlights and not even realize how bad the situation has gotten.
One of the major contributers to this problem is that headlight assemblies are made out of plastic rather than glass. Plastic is cheaper to manufacture and easier to mold, but it yellows and hazes much faster than glass.
So what can you do here? There are a couple options available, ranging from going to the pros to DIY products.
Professional Headlight Restoration
If you aren’t very handy or would prefer to leave this job to the pros, you can find plenty of services that will tackle the problem for you. Bigger cities may have specialists who do nothing but restore headlights. For other places, you may need to inquire at your local auto mechanic’s and see if it’s on their list of services.
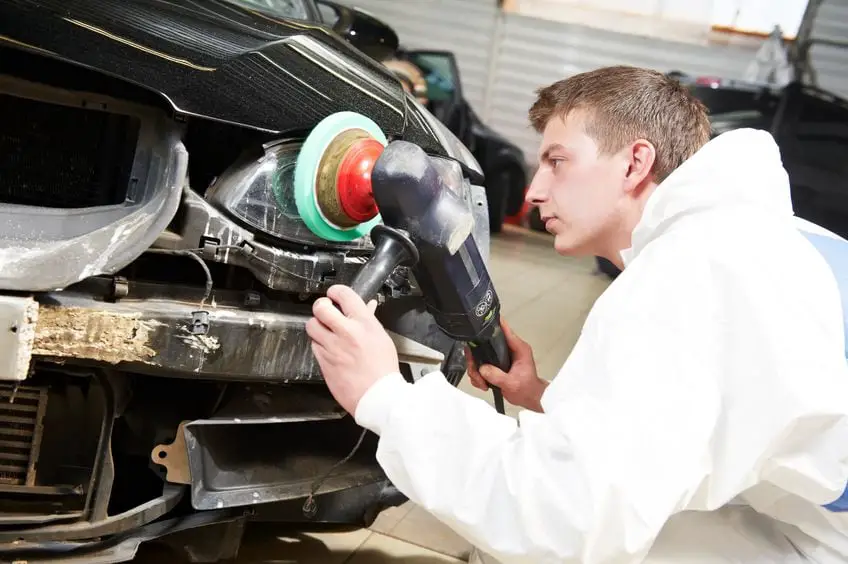
One advantage of going to the pros is that they may have access to tools and techniques that you won’t have. This could include power sanding to remove oxidation, expertly resealing the housing so it’s watertight, or using surface coatings that enhance your headlights’ overall brightness.
How much will this cost you? That varies depending on:
- your make and model of car
- how many hours of labor the job takes
- whether they need to apply a new protective coating
- if they have to completely replace the lenses
Most professional headlight restoration costs will be between $80-$150 bucks though.
How to DIY Headlight Restoration
Prefer to roll up your sleeves and tackle this on your own? Great! There are a number of products and kits on the market that can help. Most of these require just basic skill levels and common tools in the garage.
Your First Step
Let’s start with the easiest fix. Get a clean, soft microfiber cloth and a basin of soapy water. Dampen the headlights and let them sit for a minute or two. This gives the water time to loosen stubborn buildup. Wipe away the film of dirt, turn the cloth to a clean and grit-free surface, and wipe again. Rinse well.
You might be surprised by how dirty your washcloth looks after this. Do you regularly send your car through a car wash? Even if you do, your headlight lenses may not be getting the kind of focused TLC that they need to look their best.
If your lenses still need help, you may need to pick up a restoration kit like the No products found..
No products found.
How to use a Headlight Restoration Kit
You can find these kits put out by a number of companies, from Meguiar’s to Turtle Wax. Most kits follow the same general pattern of removing old sealant, buffing the acrylic lens, and resealing your headlights to prevent future damage.
1. Preparing the surface: You’ll want to make sure the headlight is clean (see above), but sometimes that’s not enough. The idea here is to remove any leftover flakes of the old protective sealant and get started on smoothing out deeper scratches on the lenses. Some kits will come with an abrasive cloth, cream that’s rubbed in, or fine grit sandpaper. Others will tell you to buy your own prepping product. If so, look for something around 1000 grit sandpaper.
2. Buffing the lenses: Your kit may have emery papers or sanding disks that can be attached to an electric drill or other power tool. You’ll work from the coarsest to the finest grit. Each pass will create a smoother and clearer surface, letting more light shine through.
3. Sealing the headlights: This sanded and polished surface may look great, but it’s vulnerable to new damage. That’s why you don’t want to skip the sealing step. This typically includes a protective clear coat that is applied, let set, and the excess wiped off. For some kits this coating may need to be reapplied. Again, for the best results you’ll need to read the instructions carefully.
Do you prefer to watch and follow along? Here’s a youtube video of the techniques. It shows off the Meguiar’s kit, but you can use those same steps with most most kits on the market.
Conclusion
Dim, hazy headlights can be downright dangerous under the right (or in this case, wrong) circumstances. With the right kit and technique, you can rewind the clock and enjoy bright headlights again. After you’ve removed the haze from your headlights consider upgrading those old bulbs with an LED Headlight Conversion Kit