Learn the ins and outs of using a dual-action polisher right here!
If you’re a car buff like me, you probably spend a lot of time cleaning and detailing your ride. Of course, how else can we express love to our pride and joy than by cleaning and polishing the paint?
Hi, Matt here. I personally like to polish and wax my cars by hand. I just think the personal touch allows me to get intimate with the various imperfections of my ride. Thus the reason why I know every scratch, nick, dent, or bump in my car’s finish. It’s just who I am.
I may be old school, but I am open to the latest tricks of the trade. I have warmed up to using a dual action polisher when I started buying more cars than I can handle.
Dual action polishers or orbital polishers will simply make the process of cleaning, polishing, and waxing the paint many times easier than doing it by hand. I used to be a complete and sweaty mess after waxing my car. But when it comes to treating the entire paint surface, nothing beats the efficacy and speed of a dual action polisher.
Are you new to car detailing? Want to learn a couple of cleaning and detailing tips along the way? This is the complete guide on how to use a dual action polisher.
What is a Dual Action Polisher?
A dual action polisher (also referred to as an orbital polisher) is a handy power tool designed specifically for polishing or waxing automotive paint.
There are two types of polishers for cars: dual-action polisher vs rotary buffer

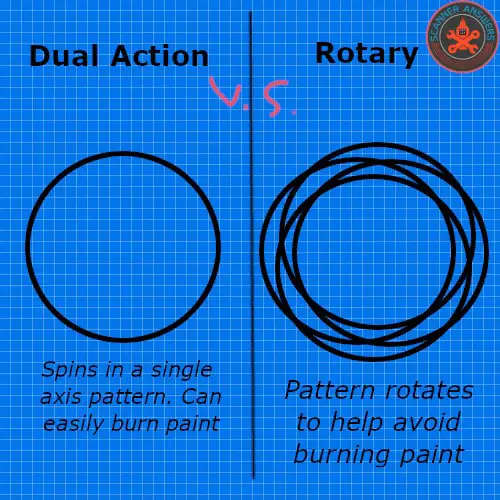
- Dual action/orbital – Dual action polishers are equipped with a central spindle that rotates around an eccentric offset. The rotating or orbiting motion produces a jiggly sensation as the head spins. The irregular or peculiar motion is responsible in preventing the polisher from burning or removing the paint.
Dual action polishers are designed to be user friendly and produce less heat on the surface of the paint. The unique orbital action of the spinning head will dispense and work the polish/wax on the paint without fear of ruining the finish.
- Rotary/circular – Rotary polishers are ideal for professional use and can be utilized to remove deeper scratches or oxidation. Rotary polishers produce a lot of heat and are necessary when treating badly marred or damaged paint. You need heat to remove a section of the clear coat/paint to reveal a smooth surface.
However, rotary polishers are not ideal for beginners. If the polisher is allowed to linger on a particular section of paint for a second too long, it will burn or eat through the paint, guaranteed.
This guide will focus on how to use a dual action polisher. We will discuss rotary polishers in a separate article.
Dual Action Polisher Accessories
Your dual action polisher is only as good as the cleaning pads. Here are the types of cleaning pads so you will easily know what you need for your car:
No products found.
- Cutting foam pad or light cutting foam pad. The cutting foam pad is great for applying compounds or polishes. This is the best pad for dual action polishers if you are looking to remove moderate to severe swirl marks, scratches, or oxidation.
The light cutting foam pad is considered an all-around polishing pad for removing light to moderate imperfections on the paint. This pad works great with paint cleaners or polishes. Cutting pads or light cutting pads are usually yellow or orange in color.
- Polishing foam pad. This pad comes in variety of textures and densities and is generally used to give the paint a high-gloss shine. Thicker varieties are great for polishing away light swirl marks while low density varieties have lower cutting power and are utilized for enhancing the gloss and shine of the paint. Polishing foam pads are usually green, white, or blue depending on the thickness or density of the foam.
- Finishing foam pad. This is the best pad to use when applying waxes or sealants. It is great for the final finishing of the paint and will also remove buffer swirls on black or dark colored paint. Finishing foam pads are usually colored black.
Check out our pick for the best dual action polishers for the money
How to Use a Dual Action Polisher
Before you get all excited on using your dual action polisher, there are a couple more things you need to do to ensure the best results.
Step 1: Wash the Car
The first part is to properly wash and dry the car. Small particles of dirt, grit, or sand will wreak havoc on your paint as the particles are absorbed by the polishing pads in your orbital polisher. This is not good since you will essentially introduce deeper scratches and swirls instead of removing them altogether!
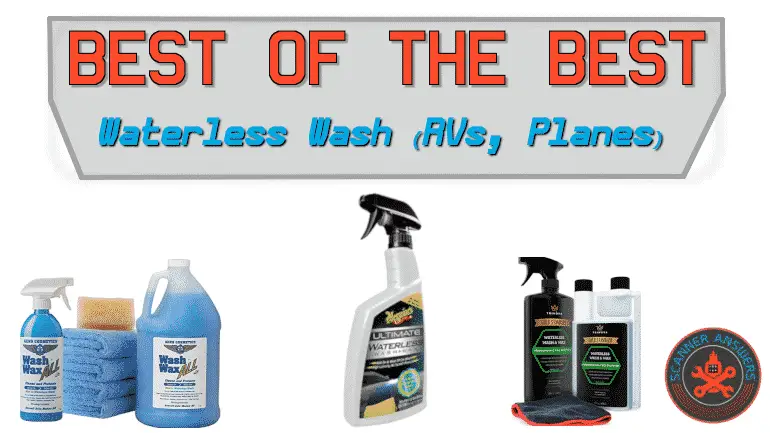
It doesn’t matter if you prefer a waterless wash or rinse-free wash. I personally like to wash my car using clean water and car shampoo, but the point is to always start with clean and freshly washed paint before applying cleaners, polishes, or waxes. Check out our favorite waterless car washes.
Pro Tip:Wash the car from top to bottom to prevent adding scratches on the upper portions of your car’s paint. Remember that the rocker panels and the lower side of the doors and bumpers are one of the dirtiest parts of the paint since they are located closer to the ground. This is the reason why you should always clean your vehicle starting on the upper panels like the hood and the roof before washing the doors.
Step 2: Paint Inspection

After washing and drying the vehicle, it is time to inspect the paint surface. You are probably dealing with some type of paint problem if you decided to purchase a dual action polisher, and that’ good for you. But you will still need to carefully examine the paint before taking the next big step.
Take your dry hand and run it across the surface of the paint. Does the paint feel rough to the touch? You will need to polish the finish and use an appropriate cutting pad. Is the paint smooth but you see a ton of annoying swirl marks and scratches? You will need to use a polishing pad.
Like I said earlier, it doesn’t matter if you’re using the most expensive dual action polisher if you end up using the wrong types of cleaning pads for a particular job.
The type of cleaning or polishing pads will depend on the type or brand of the dual action polisher and the size of the head (which is 4” to 6.5”).
Step 3: Remove Scratches and Swirls
Scratches and swirl marks are more evident on black or dark paint, but light-colored paint can also benefit from a proper polish by enhancing the color and brilliance of the surface. I like using the Meguiar’s Swirl X Swirl Remover or the 3M Scratch Remover. The Meguiar’s Swirl X is great for light to moderate swirl marks. The 3M Scratch Remover contains no wax and is designed to treat deeper scratches and swirls.
Okay, now it’s time to rock.
- Bring out your dual action polisher and cutting pad. Attach the cutting pad to the head and apply polish/paint cleaner all over the surface of the pad. Simply squeeze a moderate amount of polish on the foam pad and spread the polish using your finger.
- Make sure the pad is saturated with the product before proceeding. Add 2 or 3 pea sized amounts of polish on the soaked pad for added measure.
- Simply place the pad on the surface of the paint and turn on the polisher. Use a back-to-forth and overlapping motion to work the product on the paint.
- The typical speed setting for removing swirl marks is 5 to 6.
- Work with one small section at a time to achieve the best results.
- Proceed to treat the entire vehicle. Remember to start cleaning the upper portions before working on the lower portions of the vehicle.
It’s a good idea to clean the pad every once in a while as you are polishing the paint. You can use pressurized air to easily clean or ‘air rinse’ the pad to remove spent residue. However, the easiest way to clean a dual action pad is to use a clean terry cloth towel. Simply fold a medium-sized terry cloth towel in two and hold the towel against the face of the pad. Turn ON the polisher and use your hand to push the towel into the cleaning pad for about 5 to 10 seconds. This technique will quickly draw out excess liquid and residue from the foam so you can resume the job quickly without replacing the pad.
Step 4: Polish the Paint to a Deeper Shine
At this point, all you have to do is to change the cleaning pad to a polishing pad and grab your favorite bottle of polish. I prefer the Mother’s California Gold Pure Polish or the Meguiar’s Ultimate Polish for this step. Both products come in liquid form and are safe and effective when used by hand or a dual action polisher.
- Attach the polishing pad to your dual action polisher and apply a moderate amount of polish on the pad. Use your fingers to evenly soak the pad with polish.
- As an added measure, it is advisable to add 2 to 3 pea sized amounts of polish on the soaked pad before proceeding.
- Place the pad on the paint surface and turn ON the dual action polisher. The ideal speed setting for polishing after removing swirl marks is 4 to 5.
- Use a back and forth and overlapping motion to ensure complete coverage.
- Always polish one section at a time to achieve the best results.
- Remember to apply more polish on the pad as you move to other sections of the vehicle.
- If the polishing pad gets dirty, clean it using a dry terry cloth towel. Apply more polish on the pad after cleaning before resuming to polish the vehicle.
Step 5: Wax the Paint
The final step on how to use a dual action polisher is to wax the paint. Waxing will add a tough barrier of protection against dirt and UV rays. Pure carnauba wax will also give your paint an astonishing shine and flawless finish.
Now, you can find a ton of waxes online but I only use the Mother’s California Gold Brazilian Carnauba Wax or the Meguiar’s Gold Class Carnauba Plus Liquid Wax. Both products are formulated using the finest carnauba wax and provides deeper reflections particularly on black or dark paint.
- Grab your dual action polisher and attach the finishing foam pad. Apply a moderate amount of wax on the pad and use your finger to spread the wax over the entire surface of the pad. Apply 2 or 3 pea sized amounts of wax on the soaked pad before proceeding.
- Place the pad on the surface of the paint and turn ON the dual action polisher. The same rules apply. Work the wax on the paint using a back-to-forth and overlapping motion to ensure even coverage. Apply more wax to the pad as you move on.
- The ideal speed setting for applying wax using a dual action polisher is 3 to 4. Remember you are not trying to cut the surface when waxing. The trick is to apply an even and light coat of wax on the entire paint surface.
- Allow the wax to dry to a haze.
- Remove the residue using a clean and dry microfiber towel.
Step back and admire your work. It isn’t hard to use a dual action polisher. The trick is to use the right cleaning pads and the right products to achieve lasting results each and every time.
Conclusion
Now you know how to use a dual action polisher. True car guys will wash their cars by hand instead of wasting time and money on an automatic car wash. But the dedicated car owner will save more time and elbow grease by investing in a quality dual action polisher for paint detailing purposes.
