
Keep your lights shining bright by removing water buildup
Vince here with ScannerAnswers to share some tips for keeping your car or truck in top running shape. We’ve got some friends in Seattle that endure very rainy seasons and experience condensation build-up in their lights. This presents some serious problems because it dims the headlights and taillights and can potentially burn out your bulbs. Especially if you’re using an HID headlight kit.
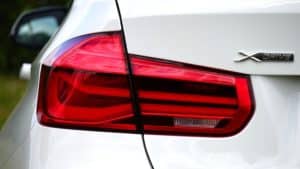
If you happen to get some water in your tail lights and are wondering how to remove it and keep it out, then you need to understand a few simple things regarding the tail light assembly of your car.
The tail lights are sealed from the factory. There are also water channels built into the tail light assembly. It is not unusual to find rubber seals along the casing. But if a seal is broken or missing, then water will have a chance to seep inside the casing.
Remember that not all vehicles are manufactured the same way and the tail light assembly will differ according to the make and model of your car. However, the basic assumption would be to open the trunk, remove the carpet sidings on the back of the tail light assembly, and carefully inspect the nuts or screws that hold the tail light in place.
Water and condensation on vehicle tail lights are unsightly to look at. It can even be a determining factor in the rapid deterioration of the lens, bulb, and casing of your tail lights. If you don’t act quickly, then rapid deterioration will not only affect the lighting performance of the tail lights, but it will also make your car look old and dull.
Of course, you can always buy a quality set of aftermarket tail lights for your vehicle, but not everyone prefers the tuned or modified look, and not everyone has money to burn for a new set of lights. You can expect to shell out at least $200 for a new set of tail lights (you will probably spend more for OEM factory parts).
 If you happen to own a new car with the warranty still intact, then it’s best to bring your car to the dealer and have the tail lights inspected or replaced. The presence of water or condensation might be caused by a faulty tail light assembly or inadequate application of sealants.
For those who have older cars, here are the simple steps on how to remove water and condensation on the tail lights of your vehicle.
How to Remove and Keep out Water from Vehicle Tail Lights
You Will Need:
- Hair dryer or blower
- Weatherstrip adhesive, butyl or silicone based sealant
- Wrench
- Screwdriver
- Terry cotton rag
Step 1 – Remove the Tail Light Assembly
Remove the tail light that contains water and condensation. This procedure will differ according to the make and model of your car. Refer to the owner’s manual or repair manual of your car. You also need to remove the electrical sockets and the bulbs before removing the tail light from the vehicle body.
Yes, you can still remove water and condensation even if you don’t remove the tail lights from the body. But if there is too much water in there, then you have no choice but to remove the tail light assembly so you can shake off all those excess water and moisture before proceeding to heat and dry up the condensation.
Step 2 – Use a Hair Dryer to Dry the Tail Light
Point a hair dryer or hot air blower on the socket holes at the back of the tail light assembly. This will help heat up the tail light and quickly evaporate water or condensation.
If your tail lights have a lot of excess water, let the water drip by turning the tail light over and remove any traces of excess moisture before using the hair dryer. Remember not to point the hair dryer directly on the lens of the tail light as excess heat may warp the lens and cause damage. Point the hair dryer on the back of the tail light as the plastic casing is more durable against excess heat than the lens itself.
Repeat the procedure until all water and condensation have been evaporated. Heat the tail light for 5 minutes and rest for 2 minutes before repeating the above-stated procedure. Be cautious not to use too much heat to avoid damaging the light.
Optional tip: (if you have a couple extra days where you don’t need to use your vehicle): Place silica gel packets inside the tail light housing. Silica gel is a desiccant that can help absorb moisture. Leave the gel packets inside for a day or two before reassembling the tail lights.
Step 3 – Inspect the Seal on the Tail Light Enclosure
The seal or weather-stripping on the tail light assembly might be warped or damaged, causing the accumulation of moisture or water. A commercially available weather-strip adhesive or silicone sealant should be applied to the edges of the tail light enclosure to further seal against water and condensation.
Carefully inspect the surrounding area and search for water entry points on the body of the casing. The weather-strip adhesive may come in handy tubes for ease of application. Follow the directions stated on the tube and let dry for at least 30 minutes.
Here is an unconventional way to find out where the leak is coming from: you can partially fill the tail light assembly with tap water, and move the tail light around to find the source of the leak. If water spills out, then you have found the source of the leak.
Of course, this also means that you will need to thoroughly dry the insides of the tail light before applying sealant. This method is not for everyone, but it is better to find the source of the leak rather than applying sealant on the entire casing.
Step 4 – Attach Tail light Assembly to the Vehicle Body
Now that you have removed the water and condensation from the tail lights, it is time to put them back in the factory position.
Align the tail light assembly on the vehicle body and secure by tightening the nuts or screws that hold the enclosure in place. Insert the bulbs and the electrical sockets and test for proper operation.
Conclusion
The methods prescribed above will also work on the headlights of your vehicle. You will need to be extra careful when using hot air on the headlights so you don’t run the risk of damaging the sensitive lens. But the procedures are basically the same, and you can have a sparkling clean set of headlights devoid of water and condensation. If you are uncomfortable performing these tasks yourself or if the issue persists, it’s advisable to consult with a professional mechanic or visit a car service center to address the problem.
If your car has water and condensation on the tail lights, you don’t need to replace them right away. Simply following the steps above will not only save you money, but it will make your car look better without burning a deep hole in your pocket.
Now that you have some clean taillights and/or headlights, make sure your engine is running in peak condition by running a full engine diagnostic scan with one of these OBDII code readers
Vince