The rubber roof in your RV is a brilliant innovation. It’s lighter than fiberglass and aluminum, and it offers up to 10 years of protection against the elements. But like all roofs, rubberized RV roofs need to be coated and sealed to offer longer-lasting protection.
Think of it as applying wax or sealant over paint. In a typical car, the metal is layered in primer, basecoat, and a clear coat to protect the color from fading. It’s the same deal with EPDM roofs. Do you notice those black streaks on the sides of your RV after it rains? Those black streaks are oxidized EPDM, meaning the roof is shedding a significant layer of the rubber roof.
But don’t be alarmed! It’s relatively healthy for an EPDM roof to shed after considerate UV exposure. But what happens next? The roof will continue to shed over the years until you get nothing but a plethora of holes and patches in your RV’s roof. This doesn’t sound good, right?
Fortunately, we have a solution – five, in fact.
Here are the best sealants for EPDM RV roofs to further protect the material from rain and UV exposure.
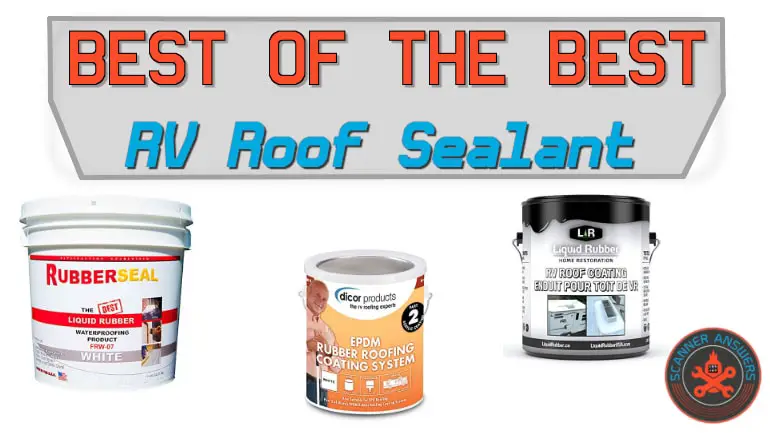
Best Sealants for EPDM RV Roof
[su_panel background=”#ffff” shadow=”2px 2px 2px #eeeeee” radius=”4″]1. Dicor’s EPDM Acrylic Rubber Roof Coating System
No products found.
Perhaps the best EPDM roof sealant is Dicor’s EPDM Acrylic Rubber Roof Coating System. It’s a two-part system that cleans, protects, and maintains the like-new appearance of EPDM RV roofs.
The first product is the Dicor EPDM Cleaner/Activator, which is expertly formulated to clean EPDM RV roofs without damage. In theory, you can use any type of EPDM roof cleaner as long as it doesn’t contain petroleum distillates or citric detergents.
Dicor’s EPDM Cleaner/Activator is easy to apply. The product is ready to use from the bottle and can be applied using an agricultural sprayer. After letting the product stand for at least 15 minutes, rinse off using a pressure washer and allow it to air dry. After rinsing, the cleaner/activator will leave a white and like-new appearance on the EPDM roof. This means the product is working and is ready for the next step.
Read our full Dicor Rubber Roof Coating Review here
[/su_panel] [su_panel background=”#ffff” shadow=”2px 2px 2px #eeeeee” radius=”4″]2. Dicor Products RP-CRC-1 EPDM Rubber Roof Acrylic Coating
No products found.
Part two of Dicor’s EPDM roof coating system is the EPDM Rubber Roof Acrylic Coating. Think of it as applying a new layer of clear coat to offer maximum protection against UV exposure and water damage.
After pre-treating the roof with Dicor’s EPDM Cleaner/Activator, the substrate is now ready for a final acrylic coat. The cleaner/activator maximizes the adhesive properties of the acrylic coating. It also maximizes the acrylic coat to offer protection against scrapes, bumps, and roof damage.
The product is easy to apply, using a medium nap roller brush or a basic paintbrush. Dicor recommends applying at least two coats of acrylic. Let it dry for at least a day, and you’re done.
Dicor’s two-part Acrylic Rood Rubber Coating System is the best EPDM RV roof sealant in the market today, but it’s not perfect. You’ll need to allocate one or two days to get the job done, and you need a fair amount of equipment to apply the cleaner/activator.
But if you do it right, Dicor’s EPDM rubber coating offers lasting protection against weather damage and UV rays. Want to prolong the look of your new EPDM RV roof? Look no further.
- Two-step process protects EPDM RV roofing from weather and UV damage
- Lasting protection for year-round confidence
- Easy to apply
- Depending on the size of your RV, you’ll need to use a lot of the product
3. Dicor 501LSW-1 EPDM Self-Leveling Lap Sealant
No products found.
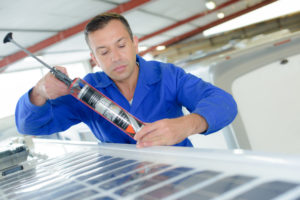
Okay, now that your RV’s EPDM roof is coated with Dicor’s EPDM acrylic coating, it’s time for the final (and optional) step. Dicor’s EPDM Self-Leveling Lap Sealant is formulated to create a secondary seal along the edges of the roof. It also seals air vents, screw heads, and vent pipes to protect against water intrusion.
Best of all, Dicor’s EPDM Self-Leveling Lap Sealant is compatible with all types of RV sheeting. This includes EPDM, TPO, aluminum, and vinyl galvanized metal. This sealant also adheres to fiberglass and concrete.
This self-leveling sealant is only ideal on horizontal surfaces. We tried using this on vertically-oriented surfaces, and the results weren’t right. You’ll need the Non-Sag version of Dicor’s Lap Sealant, which is formulated to cling over vertical surfaces. But used on horizontal surfaces, it’s one of the best RV lap sealants you can buy today. It’s also available in many colors to match the look in your RV.
- Seals roof edges, screw heads, and vent pipes
- Self-leveling action leaves a smooth and even surface
- Penetrates to all those nooks and crannies to combat water damage
- Dries quickly and offers lasting protection
- Not much
4. Rubberseal Liquid Rubber Waterproofing and Protective Coating
No products found.
This Liquid Rubber Coating from Rubberseal is also an excellent choice for both EPDM and TPO RV roofs. This water-based and rubberized roof sealant can be applied using a brush, roller, or spray. It also offers exceptional UV and chemical resistance once cured.
Unlike Dicor’s two-step acrylic coating (which requires a layer of cleaner/activator and two coats of acrylic), you only need to apply two full coats of Rubberseal to complete the job.
This product takes a while to cure. Allow the first coat to dry for at least 12 hours before applying a final coat. The product is fully cured after 24 hours and is ready to face the weather.
Best of all, this product is not only suitable for RV roofs, but also for ponds, fountains, drainage systems, gutters, and many more.
- Economical and easy to apply
- Provides lasting protection against weathering and UV damage
- All-around sealant offers excellent waterproofing protection
- It takes a long time to dry
5. Liquid Rubber RV Roof Coating
No products found.
Liquid Rubber’s flexible RV Roof Coating is also a water-based sealant that provides a heavy-duty waterproof membrane. And since the product is water-based, you can use it indoors or outdoors without using special breathing apparatus.
What we like about Liquid Rubber’s RV Roof Coating is the no pot life formula. Unlike other two-step products that need to be consumed immediately (and cannot be used afterward after opening), merely closing the container allows you to utilize the leftover sealant for later. The product is easy to apply by brush, roller, or spray.
However, there’s a catch. If you’re using Liquid Rubber on an EPDM roof, the material should be pre-treated with Liquid Rubber EPDM Primer first. Then you can apply two or three coats of this roof coating. The primer is formulated to promote adhesion of the waterproof membrane on the substrate. Otherwise, this product is ready to use on aluminum and fiberglass roofs.
- Easy to apply by brush, roller or spray
- Provides a waterproof membrane for all-season protection
- No pot life means leftover sealant can be used on other projects later
- Budget-Friendly
- Primer is required for EPDM RV roofs
How do you seal an RV roof?
It depends on what type of roof your RV has. Over the years, newer RVs have transitioned from aluminum or fiberglass to vinyl and rubberized roofs. Sealing the roof means applying a rubberized, acrylic, or elastomeric coating. This coating protects against UV damage and water intrusion.
Sealing the roof consists of cleaning the roof panel (getting rid of dirt, debris, stains, etc.) and applying a sealant over the roof.
After sealing the roof panel, applying a self-leveling lap sealant on the roof edges, air vents, screw heads, and vent pipes add a final layer of protection against harmful elements.
What is an RV roof sealant?
Roof sealants for RVs are like roof sealants for home and commercial use. The difference is the specific weight of the product. The reason many RV manufacturers prefer EPDM or TPO rubber roofs is the weight savings. With that being said, aluminum and fiberglass roofs are relatively maintenance-free. Still, they add weight and complexity to the entire setup.
However, RV roof sealants are composed of either elastomeric or water-based formulas that adhere to the roof’s surface. It’s like having an invisible layer of protection or ‘umbrella’ on top of your RV, which is applied to enhance UV protection and guard against harmful water intrusion.
What are the different kinds of rubber roof protectants?
When it comes to RVs, we only use two types of rubber roof protectants:
- Acrylic coatings (like Dicor’s EPDM Rubber Roof Acrylic coating)
- Water-based elastomeric sealants (like Rubber Seal and Liquid Rubber)
But for the most part, EPDM RV roofs need to be pre-treated with a separate cleaner or activator. These cleaners are formulated to alter EPDM’s molecular composition. This is followed by the actual acrylic or elastomeric coating for maximum adhesion.
How do I apply the RV roof sealant?
It depends on what type of roof sealant you’re using. In this example, let’s assume you’re using Dicor’s acrylic rubber roof system. The primary step is to always clean the roof using water and mild car shampoo. Yes, we use car shampoo to clean EPDM RV roofs, and we get great results by doing so. Of course, it’s also best to remove all traces of debris like leaves and pine needles.
The next step is to apply Dicor’s EPDM cleaner activator. You’ll need to use an agricultural sprayer to apply the product over the entire roof surface. It’s better to install plastic sheeting on the sidewalls as the product may damage non-rubber parts.
After spraying the product, allow to soak for 15 minutes and wash off the excess using clean, pressurized water. By this time, the roof will have a cleaner and whiter appearance.
Next, apply Dicor’s EPDM acrylic EPDM coating using a paintbrush or roller. Apply two medium coats for protection. Make sure to allow the first coat to dry before applying a second coat. Allow to dry for at least three to four hours and leave to cure overnight.
The final step is to apply a lap sealant on the roof edges. It’s also a great idea to apply sealant around air ducts, air vents, and screw heads.
How often should I seal my RV roof?
Did you know that water damage is the most common cause of RV roof repairs? A small leak can expand to more significant holes, which means more hours and money is required to fix the problem.
This is the reason why seasoned RV enthusiasts recommend inspecting and resealing your RV’s roof at least once a year.
More than preventing water from entering the interior of your RV, periodic sealing ensures all the equipment on top of your RV’s roof is secured. It’s a good idea to inspect the roof caulking around skylights and roof vents. It’s time to reapply a nice layer of lap sealant to prevent more significant leaks from happening if you see signs of cracking or chalking.
Is Flex Seal good for RV roofs?
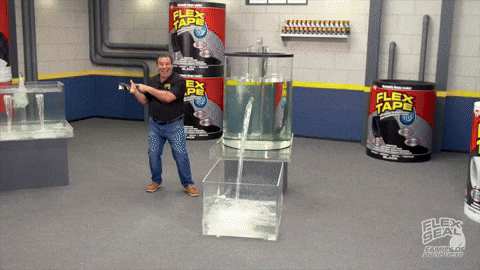
Yes. Flex Seal is handy for immediate spot repairs. It works as well as other lap sealants but does not require surface prep to work correctly.
But, Flex Seal is not a permanent repair solution. It’s only a temporary fix.
Moreover, Flex Seal is ideal for all types of RV roofs, including rubberized EPDM or TPO, metal, fiberglass, and vinyl. We won’t necessarily prescribe Flex Seal for RV roofs, but for emergencies or quick spot repairs, using Flex Seal is better than nothing.
As I said, small leaks can drastically turn into big money pits if not addressed immediately. Having some Flex Seal is the fastest way to seal a pesky leak if you’re camping in the Alaskan wilderness.
We wrote more RV rubber roof coating reviews if you’re still on the hunt for the perfect product.