An internal combustion engine works by harnessing the power of controlled explosions. The cylinders which contain these explosions must remain in good working order.
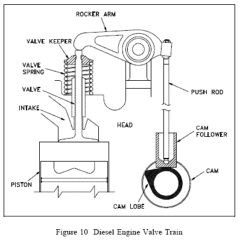
The cylinder head and engine block comprise the combustion chambers of the engine. Valves in the cylinder head allow fuel to enter the cylinders and exhaust to leave. Spark plugs ignite the mixture of fuel and air in the combustion chambers. The resulting combustion pushes the pistons, turning the crankshaft and powering the vehicle.
High pressures and temperatures can cause fatigue in the cylinder head. Fatigue can lead to cracks in the component and cause mechanical problems. These problems can include incomplete combustion, engine coolant contamination, or generally poor performance.
If the cylinder head (or head gasket) in your vehicle shows signs of damage, you should replace it to be safe. Cylinder head removal can be a delicate process; read on to learn how to tackle this job.
How to Remove a Cylinder Head
[su_panel background=”#ffff” shadow=”2px 2px 2px #eeeeee” radius=”4″]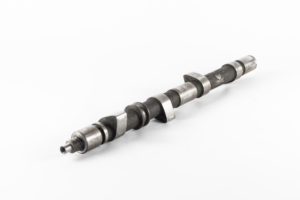
Step 1 – Determine the Engine Type
There are two major types of automotive engines:
- Overhead valve (OHV)
- Overhead cam (OHC)
Before attempting to remove the cylinder head, you must know which engine type you are dealing with. Consult the manufacturer’s specifications for guidance. You may also find that a commercial repair manual can help you.
The intake and exhaust valves on the cylinders rely on a camshaft to control the proper opening and closing sequence.
In an OHV engine, the camshaft sits below the cylinders; pushrods control the valves by way of rocker arms.
In an OHC engine, the camshaft sits above the cylinders and often runs through the cylinder head.
A timing belt or chain connects the camshaft and crankshaft and ensures that all components operate in the correct sequence. When taking apart the engine to access the cylinder head, take special care with the timing. If you do not correctly realign the timing system, you will cause significant damage to the engine.
[/su_panel] [su_panel background=”#ffff” shadow=”2px 2px 2px #eeeeee” radius=”4″]Step 2 – Prepare for Removal
Before you begin, disconnect the negative cable of the battery and remove the spark plugs. Depending on your engine layout, you may need to remove the battery to access all parts of the engine.
Drain Engine Fluids – Oil, Coolant, etc
The cylinder head serves as the junction for air, fuel, and exhaust systems. These systems allow an internal combustion engine to function. Engine coolant and oil circulate through the cylinder head to prevent overheating. To keep your work area clean and to avoid contamination, drain both the coolant and oil before unbolting any components. You may also want to use parts cleaner to clean the engine. This step can reduce the chances of getting dirt or debris into the delicate interior of the engine.
Disconnect Manifolds
If your engine’s design requires it, disconnect the intake and exhaust manifolds from the cylinder head. You should then be able to rotate these manifolds away from the engine block. To provide better clearance, you may also choose to remove the manifolds. Disconnect the air cleaner and main exhaust pipe to free the manifolds. Be sure to provide support for any now-suspended components to prevent damage.
Clear Your Workspace
Check to see if any other parts or covers block access to the cylinder head and remove them if needed. You need enough working space to dismantle the valve assembly. Take the time now to pull out and set aside anything that might get in the way. This is an excellent time to consult technical guides to ensure that you are proceeding correctly.
[/su_panel] [su_panel background=”#ffff” shadow=”2px 2px 2px #eeeeee” radius=”4″]Step 3a – Remove Rocker Arms and Pushrods (OHV Engine)
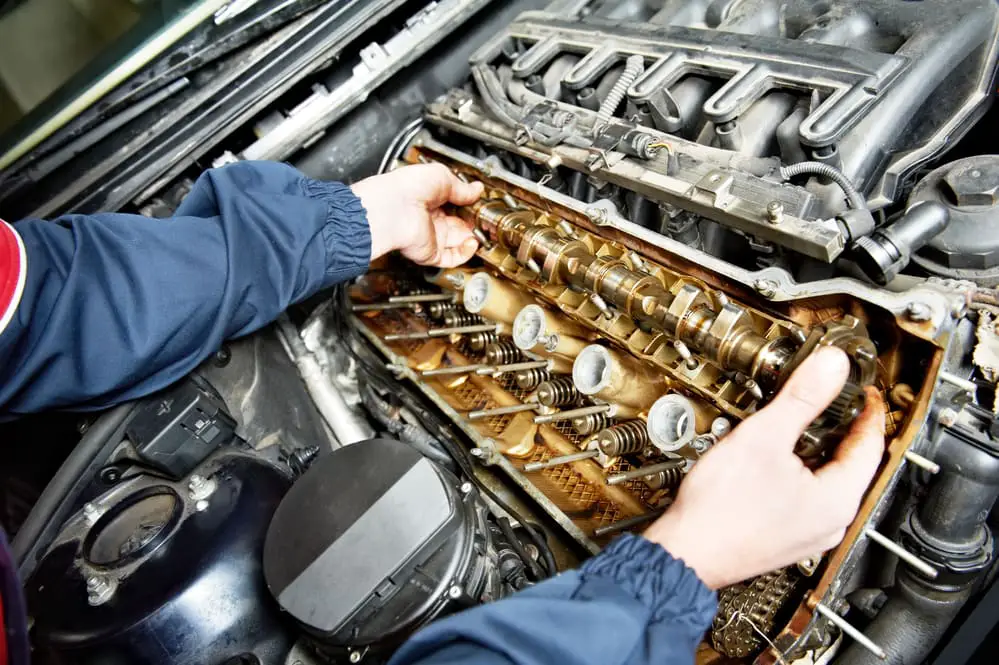
If you are working on an OHV engine, you will need to remove the rocker arms and pushrods before unbolting the cylinder head. To begin, remove the valve cover (also called a rocker cover). This component protects the rocker arms and valves from debris. Unbolt the rocker arms and set them aside in the order you take them off. These parts need to go back in the same cylinder from which you removed them.
The next step is to remove the pushrods. These parts must also follow the correct order, so you need to keep track of their sequence as you remove them. Punch a series of holes in a piece of cardboard or styrofoam and label them. As you lift each pushrod, store it in the labeled hole corresponding to the order of removal. Keep the rocker arms and pushrods in a clean area while you continue with the project.
[/su_panel] [su_panel background=”#ffff” shadow=”2px 2px 2px #eeeeee” radius=”4″]Step 3b – Disengage the Timing Belt (OHC engine)
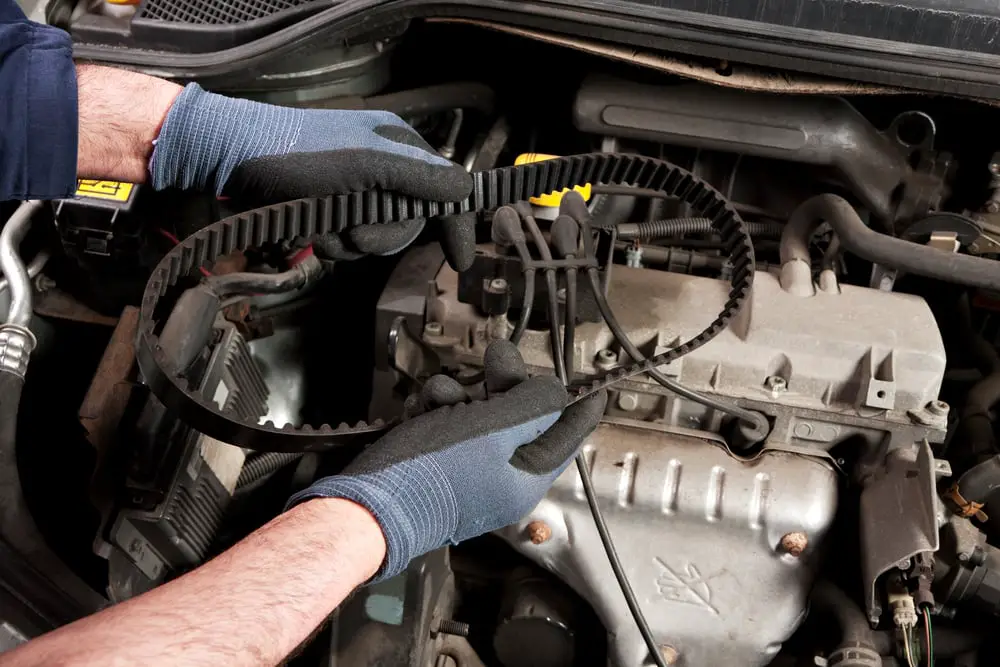
With an OHC engine, you need to disengage from the camshaft’s timing belt or chain to remove the cylinder head. Misalignment of the timing will damage the internal workings of the engine. Consider the following detailed guidance when working with the timing system. You could also allow a trained mechanic to perform the work.
As a first step, remove the timing cover and any other components that block access to the timing. Once the timing belt or chain is accessible, rotate the cylinders to Top Dead Center. Note the position of the timing alignment marks on the cam sprocket. You must be sure that the timing components align when reassembled. Loosen the tension on the timing belt and remove it, freeing the camshaft.
While unorthodox, an alternative method for disconnecting the timing system could save alignment trouble. Keeping the timing belt tightly engaged, you can slide the sprocket off the camshaft. Suspend the timing assembly out of the way without letting it slip. This allows clear access to remove the cylinder head on an OHC engine without having to reset the engine’s timing.
Step 4 – Loosen and Remove the Head Bolts
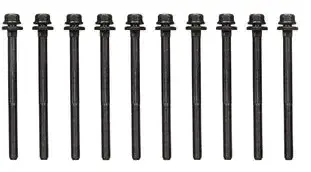
Once the pushrods (for an OHV engine) or the timing belt (on an OHC engine) are out of the way, you can continue with the project. The next step in removing the cylinder head is to remove the head bolts. These bolts connect the cylinder head to the engine block through the head gasket. As such, you must remove (and later reinstall) the head bolts in the proper sequence to avoid damage to the cylinder head.
Head bolts ensure a proper seal between the cylinder head and the engine block. A good seal is critical to prevent breaches of the combustion chambers. As such, the bolts hold tight to the engine; you may need a breaker bar to break the bolts loose. Unscrew the head bolts in a criss-cross pattern (as recommended by the engine’s manufacturer). This will reduce the chances of damaging the cylinder head or engine block.
Remove the bolts, keeping track of the order in which you pull them out. As with the pushrods, labeled cardboard labeled with holes can be useful to organize the head bolts.
Frequently, manufacturers design the head bolts as torque-to-yield components. When installed to the proper parameters, the bolts deform to the point that you cannot reuse them. If your engine includes this type of head bolt, you will need to buy replacement bolts when you reassemble the engine.
[/su_panel] [su_panel background=”#ffff” shadow=”2px 2px 2px #eeeeee” radius=”4″]Step 5 – Lift Off the Cylinder Head
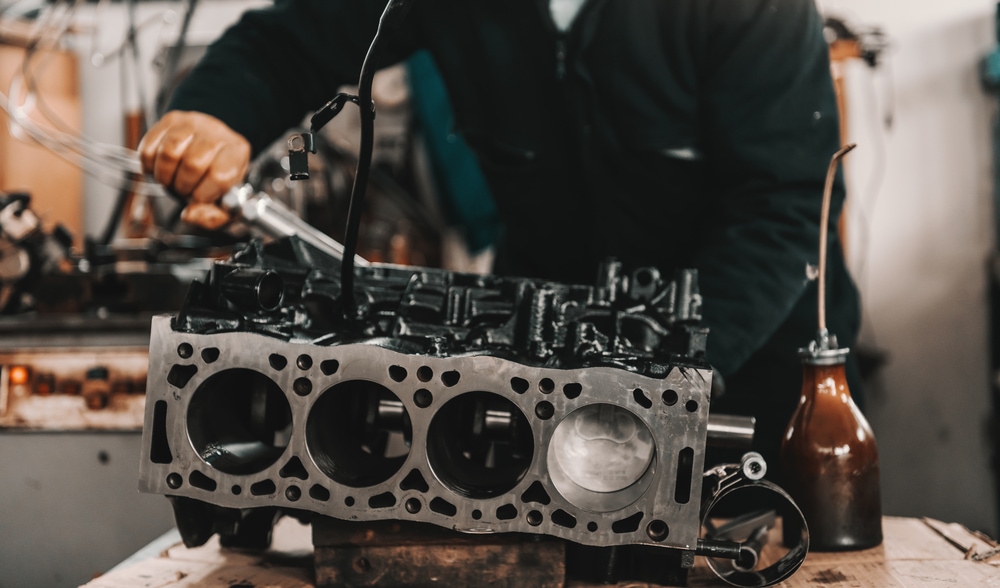
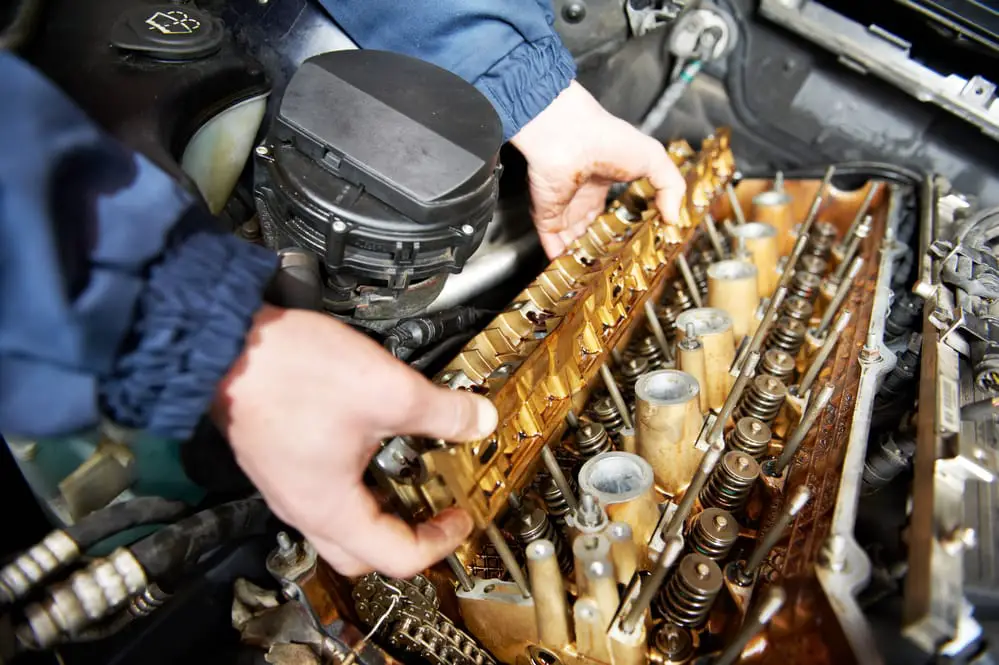
After you remove the head bolts, you should be able to remove the cylinder head from the engine block. Be careful to lift the head straight off the guide pins so as not to damage them.
You may find that the cylinder head adheres to the head gasket or the engine block. In this case, use a soft rubber mallet to tap the joint and break loose the components.
Take caution with the machined face of the cylinder head. Keep the face clean and free of scratches to ensure a tight seal when reassembled. Set the cylinder head aside with the gasket side facing upward.
With the head off, the engine cylinders will now be open to the elements. Prevent any contaminants from falling into the cylinders, where they could damage the pistons or cylinder walls.
Remember to keep track of everything as you go. Make notes about what parts you removed and from which location. This will simplify putting the engine back together. Before you move on, ensure that all the loose components are in a safe and clean area.
[/su_panel]Why Remove a Cylinder Head?
The cylinder head is a critical component of a gas- or diesel-powered engine. Likewise, the head gasket plays an essential role in the proper containment of an engine’s combustion. If you notice poor engine performance, investigate these components for any potential damage. To diagnose a problem with either of these components, you will likely need to remove the cylinder head.
You may be able to save a couple of thousand dollars by taking on this project yourself. The process of cylinder head removal can be challenging and demands careful work. A professional mechanic may be a better option. They will have the skills and tools needed to ensure proper completion of the job.