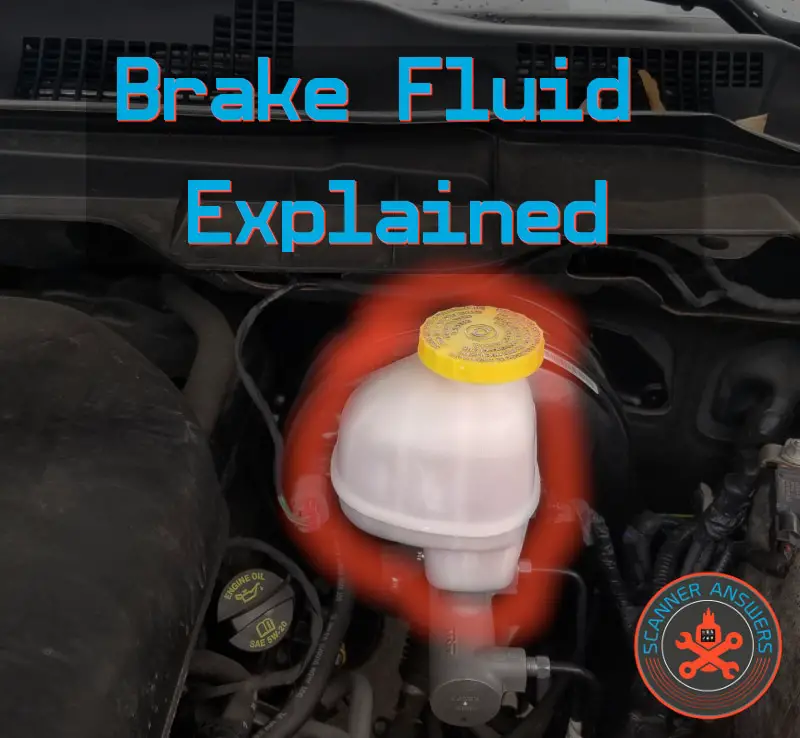
Similar to engine oil, there are many brake fluid types. Some for daily driver cars, some for the Dodge Hellcat. Knowing what brake fluid to use in your ride is an important part of vehicle ownership! Come along for the ride as we discuss this vital fluid…
What is the most common brake fluid?
The answer will have to be DOT 4 or DOT 5.1. However, this will vary wildly according to the make and model of your vehicle. In certain high-performance applications, DOT 5.1 is the norm, although you can find high-performance vehicles and crossovers with DOT 4 brake fluid.
DOT 3 brake fluid is commonly seen in older vehicles, although I noticed my Ram 1500 likes DOT 3 fluid! 🙂
What’s the difference between DOT 3, DOT 4, and DOT 5.1 brake fluid?
The biggest difference between DOT 3, DOT 4, and DOT 5.1 is the boiling point.
Suffice it to say DOT 5.1 has the highest wet and dry boiling point among the three, but this doesn’t mean it is superior. Some aftermarket brake fluids have the same boiling point as DOT 5.1 but are only classified as DOT 4. Read more about brake fluid differences from Amsoil.
Brake fluid boiling points explained
What’s the importance of boiling points?

I don’t mean to sound like a lab rat, but let’s talk about the boiling point. Before we begin, we should discuss the role of brake fluid in the braking system.
What’s brake fluid’s purpose?
Modern hydraulic brake systems require brake fluid or hydraulic fluid to transfer the braking force from the pedal to the pistons, which are located inside the brake calipers and apply force to the brake pads. This allows you to stop on a dime with utmost precision, but this is not always the case.
You see when brake fluid is exposed to higher amounts of moisture (or when the fluid degrades over time), this also affects the boiling point of the brake fluid. In effect, moisture lowers the boiling point of the brake fluid since water (which is moisture) has a lower boiling point than brake fluid at 212 F or 100 degrees Celsius.
And when the brake fluid ‘boils’ inside the system, this leads to loss of brake pressure or brake failure altogether. In other words, you wouldn’t be able to stop the car safely, or will prevent you from stopping on time to avoid a serious accident.
Maintaining the boiling point or freshness of the brake fluid is also the reason why it is important NOT to use brake fluid from unsealed containers.
Want to know the reason why manufacturers store brake fluid in smaller containers or plastic bottles? The manufacturer assumes the entire contents will be used immediately after breaking the seal and opening the container. Unlike engine oil which can last for many years inside the trunk, pouring stored brake fluid in your vehicle is like using a lower grade brake fluid (from DOT 4 to DOT 3, for instance), which also means lowering the boiling point of the fluid in your vehicle.
What’s the difference between dry and wet boiling point?
- Dry boiling point – the specific boiling point without containing water. In other words, it’s the boiling point of fresh brake fluid free from moisture and other contaminants.
- Wet boiling point – the specific boiling point of the fluid when contaminated with moisture or water, hence the ‘wet’ nomenclature. In other words, wet brake fluid contains water, which explains why the wet boiling point is lower than the dry boiling point.

What are the boiling points of DOT 3, DOT 4, and DOT 5.1 brake fluid?
Here are the boiling points of all brake fluids, including DOT 5. Take note DOT 5 and DOT 5.1 are NOT the same. I’ll explain more on this later.
| Type of Brake Fluid | Dry Boiling Point | Wet Boiling Point |
| DOT 3 | 401 F (205 C) | 284 F (140 C) |
| DOT 4 | 446 F (230 C) | 311 F (155 C) |
| DOT 5.1 | 518 F (270 C) | 374 F (190 C) |
| DOT 5 | 500 F (260 C) | 356 F (180 C) |
Remember the above figures are the minimum required boiling points prescribed by the Department of Transportation (DOT). Some DOT 4 brake fluids may have a higher boiling point than DOT 5.1 and may be classified as SUPER DOT 4, so don’t be confused. In order to determine the accurate wet/dry boiling point of the brake fluid, always read the label in the packaging.
What are the types of brake fluid?
The three main types of brake fluid are:
- DOT 3
- DOT 4
- DOT 5.1
- DOT 5 (this is an uncommon brake fluid type)
These are all glycol-based fluids. And since the main differences between the three are the boiling point, you can assume DOT 3 contains more water (or has a higher water content) than DOT 4 and DOT 5.1.
With that being said, DOT 4 is a refined version of DOT 3, hence the higher boiling point. DOT 5.1 is a more refined version of DOT 4. This makes it an ideal and cost-effective upgrade from DOT 4, but only if your vehicle really needs it. If you do a lot of heavy towing or high-performance/high-load driving applications, flushing out the existing DOT 4 brake fluid and replacing it with DOT 5.1 will yield significant braking improvements, most particularly in challenging or harsh driving conditions.
Yet another type of brake fluid is DOT 5, which is silicone-based. Unlike glycol-based brake fluid which has a tendency to absorb water or moisture due to its hygroscopic properties, DOT 5 brake fluid is the exact opposite. It doesn’t absorb moisture, so this makes it ideal for repeated high-heat applications such as racing or track applications.
And unlike glycol-based brake fluid, DOT 5 won’t harm or burn off paint. This is the primary reason why vintage muscle cars, classic cars, and certain motorcycle brands like Harley-Davidson recommend DOT 5 brake fluid. This helps to avoid damage to paintwork and plastic panels when servicing or repairing the hydraulic brake system.
Does the type really matter?

The quick answer is yes. Yes your brake fluid type matters!
To answer this question further, you have to know what application you’re using your vehicle for. If you’re daily driving your 2005 Toyota Corolla to work and back, DOT 3 will be fine. But if you’re towing 15,000 pounds in your Dodge 2500 Cummins Dually, you’d benefit from DOT 5.1.
Can you mix brake fluid types?
It is always better to flush out the old fluid before filling the reservoir with fresh brake fluid, most especially if you’re planning to upgrade from DOT 3 to DOT 4 and onwards to DOT 5.1.
Since DOT 3, DOT 4, and DOT 5.1 are all glycol-based, it is relatively safe to mix the three without damaging or reducing braking performance. But then again, even though it is safe to mix brake fluid types, this is not advisable from a professional point of view.
However, DOT 5 is silicone-based and should NEVER be mixed with glycol-based brake fluid. If you do, it is not unusual to expect spongy brakes, poor braking performance, and even damage to caliper seals and hydraulic seals.
In summary, you can mix DOT 3, DOT 4, and DOT 5.1, but it doesn’t mean that you should. NEVER mix DOT 5 with a different type of fluid!
With you and your family’s safety in mind, it is never a good idea to mess with the brakes in your vehicle. If you know nothing about handling brake fluid or brake servicing, it is better to consult a professional mechanic for maintenance and repair.
How will I know the type of brake fluid in my vehicle?
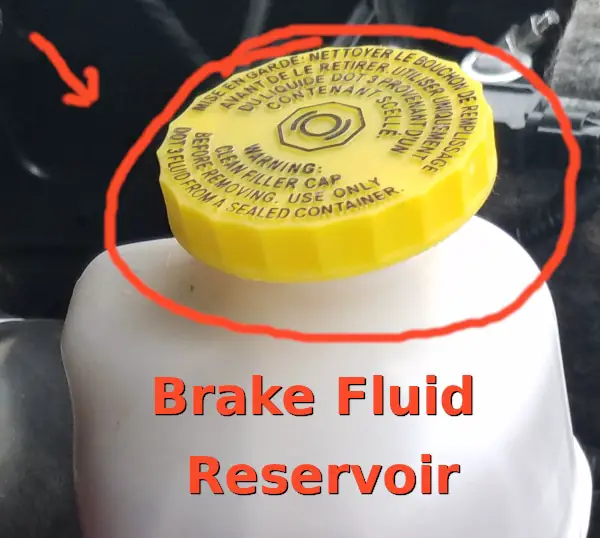
There are two main ways to find out: the cover in the master cylinder and the owner’s manual.
Pop open the hood and locate the brake master cylinder. The cap will tell you the type of brake fluid. Also, check under the hood or around the engine bay near the master cylinder. You may find decals on the type of brake fluid in the vehicle.
You can also check the owner’s manual or the vehicle service manual. It will also indicate the brake service intervals so you’ll know the best time to have the brakes checked (which depends on either time or mileage of the vehicle).
How do I flush the old fluid in my car?
If you’re like me and like videos, EricTheCarGuy did a great video demonstrating this process. Give it a watch!
Alright, you know what you’re doing huh? Let’s get into the guide to changing your own brake fluid.
You’ll need an able assistant and a couple of handy tools to completely change out old brake fluid in your vehicle. Of course, you can always let a professional handle the job, but why spend $100 if you can do it yourself?
Materials needed:
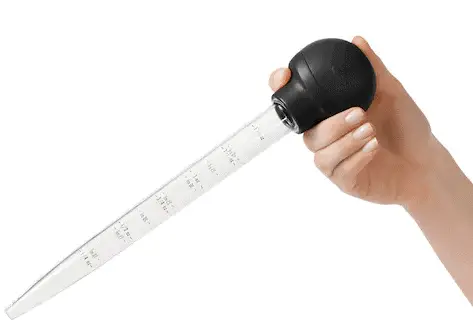
- Turkey Baster
- 8mm or 10mm socket or open wrench
- Small plastic bottle and plastic/rubberized tubing
- Fresh brake fluid
- Microfiber towels
- Jack and jack stands
- Setup your vehicle for the job.
Park your vehicle in safe and level ground, preferably indoors or inside a garage. Jack up the vehicle, remove the wheels on all four corners and set the vehicle on jack stands. You do still flush the brakes if you don’t have jack stands, but you’ll end up repeatedly raising and lowering the vehicle to complete the job. - Locate the brake fluid reservoir, clean the cap, and suck out the liquid with your turkey baster.
Pop open the hood and remove the protective cap in the brake master cylinder. What I usually do is to clean the cap first using a diluted solution of water and dish soap to prevent contamination, but you can do so by simply wiping the cap clean using a microfiber towel and move on.After removing the cap, set it aside. Grab the turkey baster and suck out all the old brake fluid inside the reservoir. Make sure to remove as much of the old fluid as you can. Place the discarded fluid in a small plastic jar or container for proper disposal. - Pour in the new fluid!
Open the new bottle or can of fresh brake fluid. Pour brake fluid inside the reservoir but do not overfill! Replace the cap and tighten lightly. Do not overtighten the cap either since you’ll be pouring fresh brake fluid as you flush out the old. - Find a plastic bottle, you’re going to flush the old fluid.
Grab a small plastic bottle, preferably one with the cap still on. The idea is to punch a small hole in the cap so you can insert the flexible tubing inside the bottle without removing the cap. Next, fill the bottle with a small amount of fresh brake fluid. The idea is to submerge the end of the tubing to prevent air from entering the system as you flush. - Insert the tube and loosen the bleeder screw.
Whenever I flush the fluid, I start with the front-left and right-rear side before moving to the right-front and left-rear. The idea here is to start flushing the fluid from the side of the vehicle which is closest to the master cylinder. However, you can flush the brakes in any manner or procedure. I simply prefer to do it the right way.Now we got that out of the way, let’s proceed with the flushing. Insert the end of the tubing into the bleeder screw, which is usually located in the top-rear of the brake caliper. Use an 8mm or 10mm wrench to loosen the bleeder screw. Make sure to insert the tube before loosening the screw to prevent air from entering the system. - Have a friend or assistant sit in the driver seat and pump the brake pedal repeatedly.
Notice color of the fluid inside the hose as the brake pedal is pumped? As soon as you see clear fluid being pumped out, tighten the bleeding screw and remove the hose. You have successfully flushed out the old fluid from the vehicle! - Refill the reservoir again.
The next step is to refill the reservoir with fresh brake fluid. The idea here is to flush then refill each time until the job is complete. - Repeat until the brake fluid drains out the same color!
After refilling the master cylinder with fresh brake fluid, repeat the above-mentioned steps until all the brakes have been flushed individually.
The final step is to install the wheels, lower the vehicle back to the ground, and you’re done!
As a final precaution, you should double-check the level of brake fluid and tighten the cap securely before driving off. Don’t make it a habit of repeatedly opening or closing the reservoir to check the level of brake fluid. There’s a reason why the reservoir is transparent, after all.
Read more about brakes with these guides:
- When To Replace Brake Pads
- Brake Pads Cost
- Different Types Of Brake Pads
- Average Lifetime Of Brake Rotors
- Difference Between DOT 3, DOT 4, And DOT 5.1 Brake Fluid
Conclusion
Hopefully this guide has helped you better understand all the brake fluid types. If you have any questions or comments, please contact us!
-Vince
Read more about brake fluid types: https://ebcbrakes.com/articles/brake-fluid/
“Mad Scientist” Image by André Santana from Pixabay