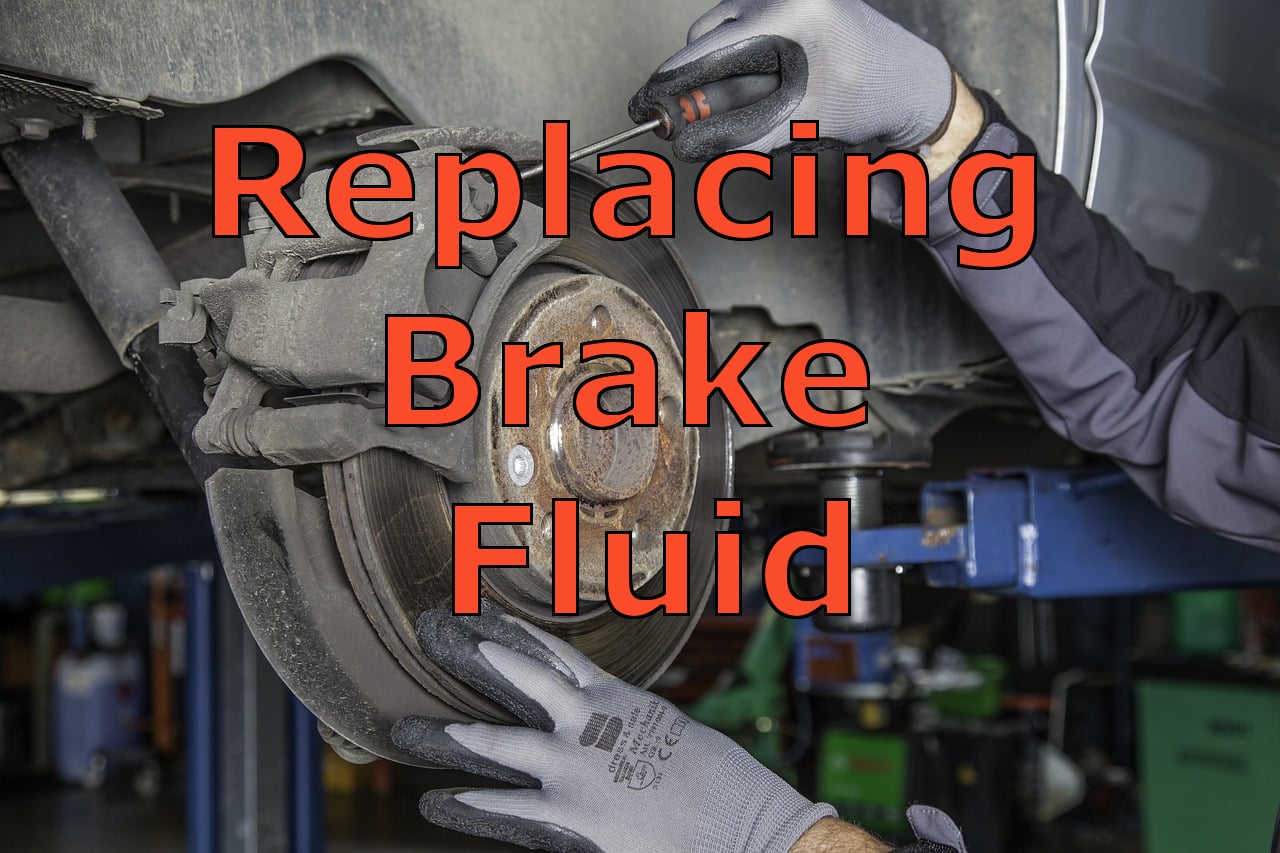
Changing brake fluid and choosing the right type
Are your brakes not working as they once did? It may be time to replace the brake fluid to get your calipers and pads back to full stopping power!
Does changing the brake fluid in your car sound like an odd task? It shouldn’t be. It’s not as popular as changing the engine oil or flushing the coolant in the radiator, but the brake fluid is probably the most neglected fluid in your car.
Many car owners perform routine checks without checking the level or general condition of the brake fluid in the reservoir. That’s too bad. Are you aware that the average motorist who drives 10,000 or 15,000 miles per year will push the brake pedal at least 75,000 times? Now that’s a lot of brake travel in a single year.
As the brake fluid ages, it has endured consistent drops and rises in temperature. It will also absorb a modicum amount of water or moisture. The braking system is basically a sealed unit, but water can still enter via microscopic pores in the rubber hoses and seals. Moisture can also enter by consistently opening the brake fluid reservoir and exposing the stored fluid in the air.
It all boils down to this: brake fluid that contains a lot of moisture will have a lower boiling point. This is bad because when the brake fluid boils, you will lose braking power in a snap of a finger. The brake fluid in a brand new car will contain as much as 2% water after only a year of service. After 4 or 5 years, the water content will rise to as much as 7% or 8%.
This is the sole reason why you should learn how to replace the brake fluid in your car. Of course, you can always let your favorite mechanic or garage do the job for you, but why waste money when you can do it on your own, right?
However, changing the brake fluid is not exactly great for novices. If you don’t know jack about cars, then proceed with caution. Flushing and bleeding the brakes requires a moderate level of technical and mechanical knowledge.
How does the brake fluid work?
It’s actually pretty simple. The brake fluid is utilized by the system to transfer the action of the brake pedal to the master cylinder and to the pistons in the brake caliper. Brake fluid will also protect the parts of the system from rust and corrosion.
What are the different types of brake fluids?
There are basically 2 types of brake fluid:
- Polyalkylene Glycol Ether – This type of brake fluid is either DOT 3, 4, or 5.1. In terms of boiling point, DOT 5.1 has a higher boiling point than DOT 4 or DOT 3. This type of brake fluid is hygroscopic and can mix with water without significantly degrading the performance of the fluid.
- Silicone brake fluid – Silicone-based brake fluid is regarded as DOT 5. This brake fluid is generally used for military-type vehicles. Silicone brake fluid is non-hygroscopic and will not absorb water. This type of brake fluid is highly compressible and is not recommended for road use since it will lead to a spongy brake pedal.
What brake fluid should I use for my car?
Simply check the markings on the cap of the fluid reservoir. Modern cars will require DOT 3, DOT 4, or DOT 5.1 brake fluid. You should only use the recommended brake fluid for your vehicle. You can also check the owner’s manual or service booklet just to be sure.
If you need to replace your outdated fluid and want to get the best for your ride, check out our best brake fluid guide the Matt wrote back in July.
When should I replace the brake fluid?
There is a lot of debate on this topic. European or German cars will require a brake fluid change every 2 years or 20,000 miles whichever comes first. Other cars will require fresh brake fluid at least every 30,000 miles.
On the other hand, certain Japanese and American cars don’t even list the brake fluid as a regular maintenance procedure. Does this sound fishy to you? Probably.
As a general rule of thumb, you should change the brake fluid each time the brake pads or the rotors are replaced. This alone will save you more money in the long run since it will prevent the brake lines or the master cylinder from corroding to a crisp. Replacing the brake fluid is cheap insurance against total brake failure.
Check the owner’s manual to accurately determine the periodic maintenance interval of the brake fluid in your car. If the manufacturer says you should only change the brake fluid every 5 or 10 years, you should consider talking to the service advisor and insist on new brake fluid at least every 2 or 3 years.
How to Replace the Brake Fluid
The easiest way to change the brake fluid in your car is to use a pressure bleeder. This device will pump pressurized brake fluid inside the master cylinder so all you need to do is to bleed the brakes until fresh fluid comes out of the system.
But a pressure bleeder will set you back at least $50, and you will only need to use it once every 2 or 3 years. Unless you own a fleet of cars or if you work with cars a lot, there is no need to spend money on a pressure bleeder.
Here’s a great video guide to making a DIY brake bleeder
You will need:
- A fresh and sealed bottle of brake fluid
- Basic socket or wrench set
- Microfiber or terry cloth towels
- Fender cover
- Turkey baster
- An old plastic soda bottle
- Plastic air hose or tube
- Engine degreaser
- Jack and/or jack stands
Step 1: Prepare the materials.
You might be wondering why you’ll need an old plastic soda bottle and a plastic air hose to change the brake fluid. This kit will prevent you from making a mess while bleeding the brakes. Simply drill a small hole on top of the cover of the plastic bottle and insert the air hose until it reaches the bottom of the bottle. There should be at least 6 to 10 inches of air hose protruding from the top of the bottle. You now have your very own bleed bottle. Make sure that the tube or the air hose fits tightly on the bleeding screws of the brakes.
Step 2: Park the car in a safe and level area.
Park your car in a shaded garage. Always work on level and hard ground especially if you’re going to use a jack and jack stands. It is also a good idea to wear safety goggles and a pair of hand gloves for added protection.
Step 3: Raise the vehicle from the ground and remove the wheels.
You can remove all four wheels and suspend the car using a handy set of jack stands, or you can simply work with one wheel at a time. The choice is up to you.
Other people prefer to bleed the brakes from one wheel only. I prefer to bleed all four sides of the vehicle. This will ensure that all of the old brake fluid is flushed out of the system. Flushing on all four sides also gives me added peace of mind.
Simply jack up the car and hold it in place with jack stands. You can then proceed to remove the wheels.
Step 4: Pop open the hood and clean the master cylinder.
Place a cover on the driver’s side fender to protect the paint from corrosion. Brake fluid is highly corrosive and will eat paint like piranhas eating a gazelle.
Before opening the cap on the master cylinder, it is a good idea to clean the surrounding areas first and foremost. This will prevent dirt or dust from entering the reservoir. It is also more pleasurable working with a clean area.
Grab a can of engine degreaser and spray until the master cylinder is clean. I prefer to clean it until I can see the fluid level from the reservoir. Rinse and wipe dry before proceeding.
Step 5: Remove the old brake fluid.
Use a turkey baster to remove the old brake fluid. Simply open the cap, grab the turkey baster, and squeeze and dump out the old fluid in a separate container. There is no need to remove every last drop of brake fluid inside the reservoir.
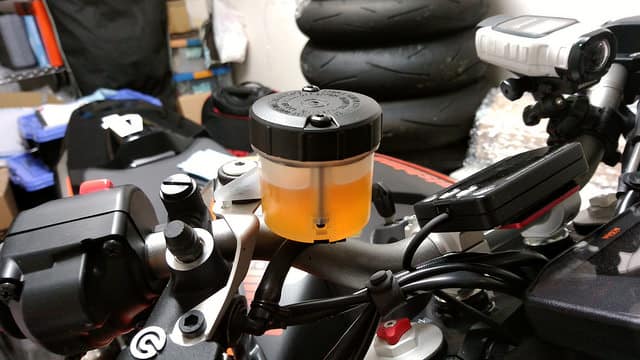
Step 6: Pour fresh brake fluid.
Make sure you are pouring fresh brake fluid from a sealed container. Pour an ample amount of fresh brake fluid inside the reservoir until reaching the FULL level. Replace the cap tightly and prepare to bleed the brakes.
Step 7: Bleed the brakes.
Star bleeding from the front left side of the car. This side is closest to the master cylinder and should be the first to be bled. I prefer an X-pattern when bleeding the brakes. Start from the front left side and move to the right rear side. The front right side should be next, and the rear left side should be last.
Locate the bleed screws, remove the protective rubber plug, and use an 8mm or 10mm wrench or socket set to loosen the bleed screw. There is no need to severely loosen or remove the bleed screw.
Grab the plastic bottle with the air hose. Insert the end of the air hose on the bleed screw. Make sure that it’s tight. If it feels loose, you will need to use a smaller diameter hose.
After loosening the bleed screw and installing the tube over the screw, you can know bleed the brakes. Simply pump the brake pedal for a couple of times until you see fresh fluid flowing inside the bottle.
That’s basically it. Once you’re done, remove the hose, retighten the bleed screw, and replace the rubber cover on the screw.
Step 8: Refill the reservoir with brake fluid after each bleeding.
After bleeding one side of the car, it is good practice to check the level of the brake fluid in the reservoir and refill when necessary. Do not allow the reservoir to run dry. This will only serve to introduce more air into the system.
Pour fresh brake fluid up to the FULL marking, replace the cap, and proceed to bleed the brakes once more.
Step 9: Bleed the other sides of the car.
Continue by bleeding the right rear brakes, the front right, and the rear left side. Repeat the procedures in step 7. Do not forget to add more fluid inside the reservoir after bleeding each side.
Step 10: Check the fluid level.
After bleeding all four sides of the car, you should check the brake fluid level once more and refill when necessary. Make sure to tighten the cap in the reservoir once you’re done.
After this, simply bolt-on the wheels, jack the vehicle, remove the jack stands, and you’re good to go. It wouldn’t hurt to take a short test drive to check the integrity of the brakes.
Conclusion
It is easy to replace the brake fluid in your car after doing it once or twice. This simple task will ensure maximum stopping performance when you need it most. Always pour in a fresh batch of brake fluid from a sealed container. It is never a good idea to use brake fluid from a previously opened bottle.